I have a long history with Sarah J. Maas. I think I picked up her first book , Throne of Glass, when I was 12 or 13? I’ve had it on my shelf forever and absolutely adore that book. I haven’t finished catching up on that series which has seven books along with a novella but it was absolutely worth every minute spent reading those books so far. I also dipped my toe into Maas’ next series, A Court of Thorns and Roses, which is fantastic. Maas is an unparalleled writer in the YA world, both for her prolific output and the sheer delight of her novels. I am in the process of finally finishing the Throne of Glass series after a serious hiatus while waiting for the final book and for my college life to slow down and I am super excited for those books. Maas’ most recent novel is a wonder of world-building and action packed romance and I wish I could read again for the first time because I enjoyed it so much!
The novel, Crescent City, mainly follows Bryce Quinlan, a young Half-fae girl haunted by tragedy. Bryce joins forces with the breathtakingly handsome and brooding fallen angel, Hunt Athalar for the opportunity to find the murderer of Bryce’s best friend. Romance and action ensue in a read that took me two days to devour. Bryce and Hunt race through the streets of Crescent City, doing battle with the forces of evil and discovering just what is possible through love. This book is filled with twists and turns to the point of absurdity but I enjoyed every second of it. Maas is a master of fantasy fiction and this book is just proof of her skills. I would recommend this book to fiction and fantasy fans of all ages, although there are some graphic scenes so this one would not have been for twelve-year old me. Happy Reading!
I cannot remember where I first saw this book but I’ve had it on my book wish list ever since it came out in 2019. I read all 412 pages in less than two days but I also had time to spare and work to procrastinate on. I was fascinated by the premise of the book that followed the murder of a young single mother during the Troubles, but this book ended up being so much more than that. The book not only follows the aftermath of the disappearance of Jean McConville, but also paints a rich history of the birth of the Provisional IRA and their role in the most violent years of the Troubles. I was aware of the Troubles as a problematic period in the history of the UK Commonwealth and Ireland but really didn’t understand the depth of the issues that were fought over and how high or low intensity that conflict was. Before reading this book, my only experience with the Troubles was from watching Derry Girls, a Netflix comedy about teenagers coming of age as a peace plan is finally agreed upon. Coming from a place where I knew next to nothing about the Troubles, this book was an excellent primer into this tumultuous period in Irish history.
The book centers on the disappearance of Jean McConville but also intertwines the stories of most of the important figures in the Provisional IRA or the Provos. At first I was mildly confused about why Keefe was sharing the history and stories of the Provo leadership and main actors in this book, but it all made sense once Keefe got into the meat of Jean McConville’s disappearance. I really enjoyed reading this book, even though the period of history that it discusses is dark and still a recent wound for many living in Northern Ireland. Most of Keefe’s work draws upon a prodigious and mismanaged project from Boston College to create an oral history of the IRA and the Troubles. This history was not meant to have been accessed until all the participants had died, but it became a centerpiece in the legal battle to bring Jean McConville’s murderers to justice and thus became an integral part of the story. I would absolutely recommend this book to almost anyone. It may be a bit dark for some readers, but I think that just has to do with the facts of what happened in Northern Ireland during this period. I hope you get the chance to read this book and enjoy it just as much as I did! Happy reading!
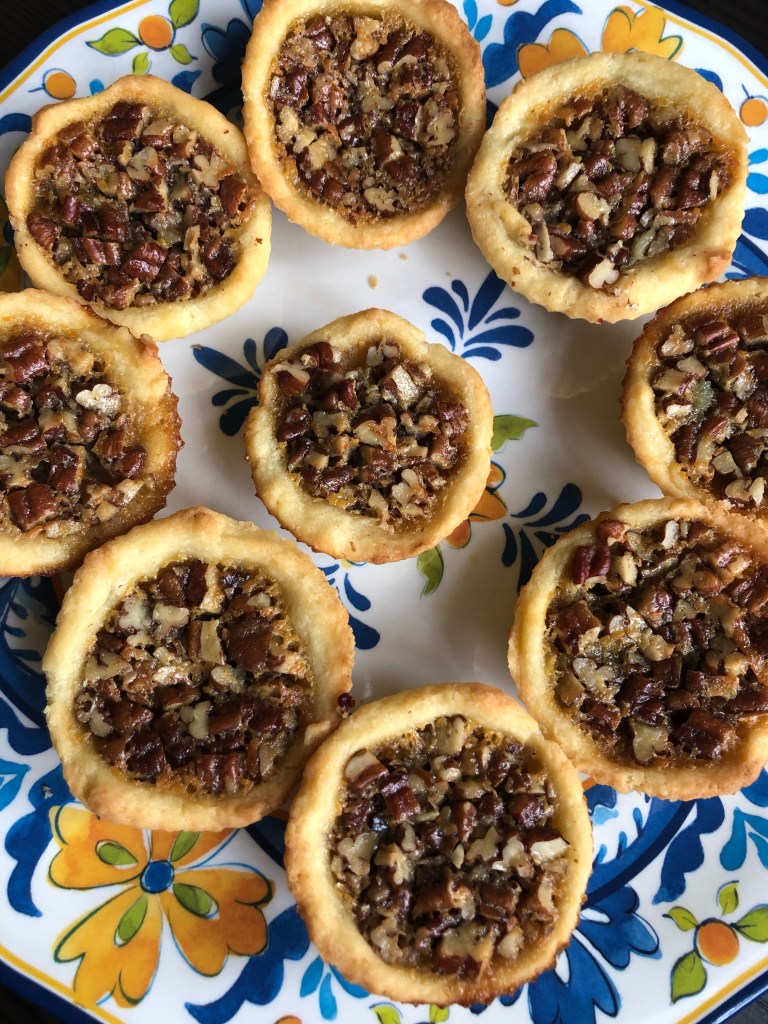
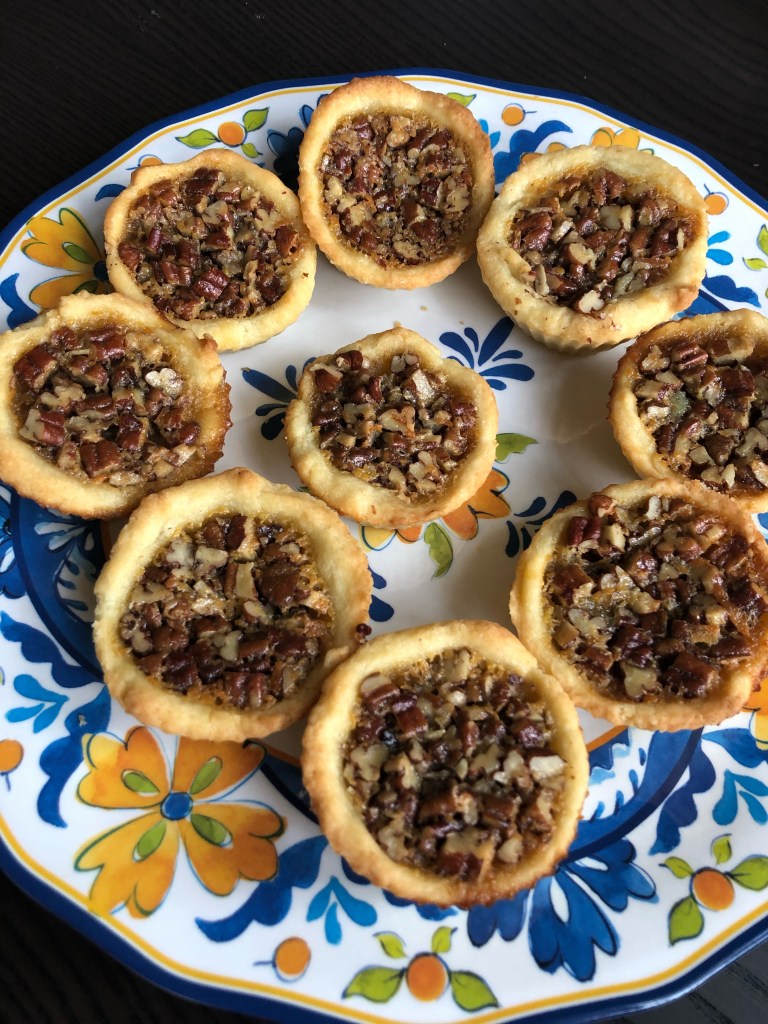
These are so good that one did not even make it to the plate for a photo. The day after I baked these, they were GONE! They are so good and I cannot wait to share the recipe! I found these after searching around for fall desserts on the New York Times Cooking App and came across these darlings! On their app, they’re called Pecan Tassies and are meant to be similar to a bite-size cookie. I ended up modifying the recipe slightly and making them much larger for a more satisfying bite and now I’m calling them mini-pecan pies! I love pecan pie and it’s one of my favorite foods that we have around the holidays. It’s also the favorite pie of my father whose birthday falls around Thanksgiving time. This year, I wanted to make these for our scaled down gathering and they have already been a big hit with my boyfriend. I can’t wait to make these for my whole family over the holidays!
I made a couple of modifications to the original recipe that really make all the difference. My recipe makes about ten cupcake sized pecan pies which I baked in a single muffin tin using reusable muffin liners. You can also make these in a mini-muffin pan that produces quite a few more so it’s your choice. The baking time doesn’t vary so you can’t go wrong either way. The dough that holds the pecan pie goo is quite soft and should be handled as quickly as possible so it doesn’t get tough or melt all over your hands. I added a tablespoon of maple sugar to my recipe which more than the two teaspoons of sugar from the original recipe but the addition makes the mini pies truly delectable. If you don’t have maple sugar, you can use regular granulated sugar or look for some maple sugar in stores. In my post “Maple Shortbread Cookies” I also include instructions for how to make maple sugar from maple syrup which you can always do as long as you have Grade A maple syrup around. The pecan pie goo is delicious but make sure your butter is truly melted before you mix it. When I was making my mini pies, I didn’t melt it as well as I should have and ended up with butter chunks that I slowly had to melt while trying not to cook the egg that I had already beaten in! As long as your butter and cream cheese are close to room temperature, it’s a super easy and quick recipe to whip together. Happy baking!
Mini-Pecan Pie Recipe
For the Crust
85 grams (6 tablespoons) unsalted butter, at room temperature
123 grams (4 oz) cream cheese at room temperature
1 tablespoon maple sugar (or granulated sugar if that’s all you have)
1/2 teaspoon kosher salt
128 grams (1 full cup) All Purpose flour
For the Filling
1 large egg
78 grams (1/4 cup) maple syrup
2 tablespoons dark brown sugar
28 grams (2 tablespoons) unsalted butter, melted
1/2 teaspoon vanilla extract
66 grams (2/3 cup) pecan halves, finely chopped
Preheat the oven to 350 and spray a dozen non stick muffin cups.
Make the dough. Beat together the butter, cream cheese, sugar, and salt until creamy. Beat in the flour until the dough just comes together. Portion out the dough and press into a cup shape in the muffin tin.
Make the filling by whisking together all the ingredients except the pecans.
Sprinkle the pecans inside the crust in each of the cups before you add in the filling to evenly distribute the pecans. You’ll use 2 or more tablespoons per crust.
Bake until the filling is set and the crust is brown 20-27 minutes (the original recipe went to 25 but I needed two extra minutes so go to 27 if your oven takes its time when baking stuff)
Remove the tin from the oven and let cool on a wire rack for at least ten minutes. After ten minutes, remove the pies from the muffin tin and let cool on the wire rack. Once cooled, eat with a little whipped cream on top for a truly decadent mouthful!
I believe that this book has been on my shelf since last Christmas and here I am, eleven months later, finally getting around to reading it. I’m glad that I did because it was a wonderful way to take my mind off the stresses of the end of the semester and the wild world that we live it! Daisy Goodwin creates a lush world set in the Gilded Age and does a fantastic job of doing so. Her novel follows the young Cora Cash, the wealthiest heiress in America, and her journey to England to fulfill her mother’s ambition of marrying into the English gentry. This is a phenomenon that I’ve read a ton about because I find it super fascinating but this is the first fictional novel that I’ve read within the topic. Miss Cash not only finds love but has to navigate a complex world, completely foreign to her and I can say that this is a relatable journey! Sometimes as a West Coast girl on the East Coast, I feel like I can never get it quite right but I keep trying just as Cora does. This book was a quick read for me, I started it the night before I finished it.
Ms. Goodwin’s novel enthralled me. I was spellbound until the last few pages. I loved reading the novel but I found the ending to be supremely unsatisfactory. The curtain closed on the characters and I was still left with so many questions! I hope that you have a chance to read this so you can join me in my speculation! I found the novel to flow well but the character development was somewhat lacking. Even though the novel purported follows a maturing Cora Cash, I wasn’t able to find much maturity in Cora before the last ten pages of the novel. I don’t know if I would have been happier with a longer novel but I was not left quite satisfied. I do hope that I get the chance to read another one of Ms. Goodwin’s novels in the future but hope that it doesn’t leave me as wanting as this one did! Happy reading!
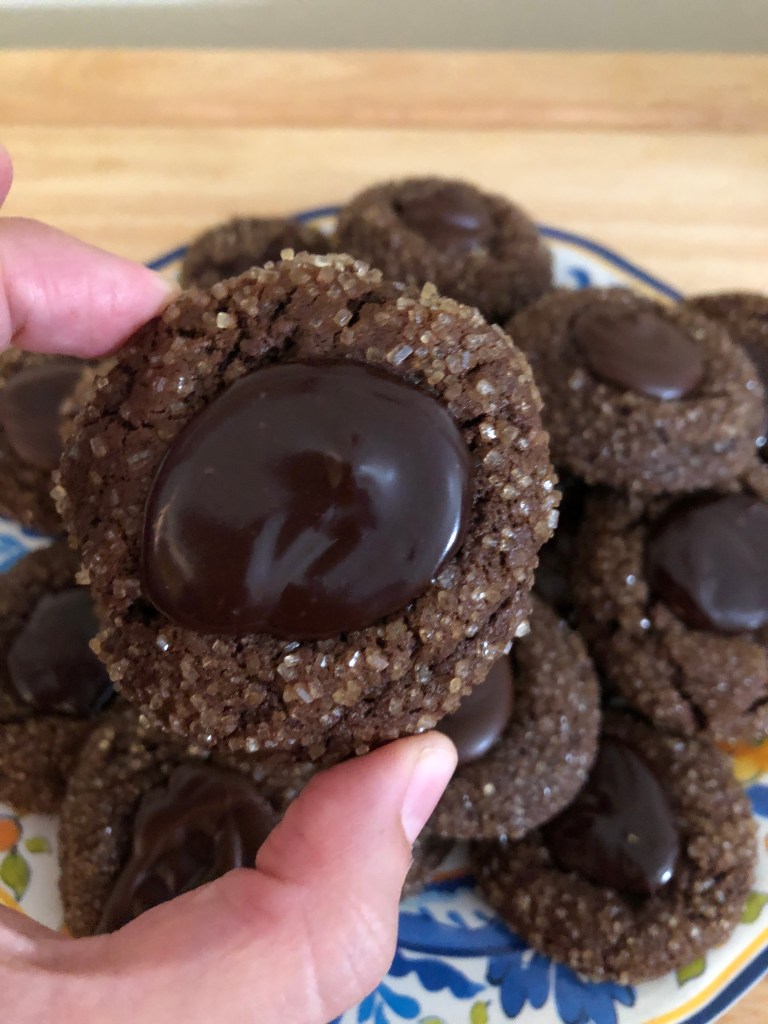
These cookies are a little more laborious than my preferred cookie recipes but it is totally worth it! I’ve never made button or thumbprint cookies but I thought I’d give it a try! I was super pleased with the way that these came out! Normally, molasses and other liquid sweeteners like honey have a tendency to spread the dough as it bakes and it can create really moist but very flat cookies. These cookies are fantastic and moist but hold their shape very well. I think they’re really cute and they’d make a great cookie for a holiday cookie exchange once we don’t have to worry about covid-19.
The trick here is the two-hour chill in between making the dough and baking it. It may be tough to wait if you’re impatient like me but I found that taking a nice long walk made the two hours pass by in a breeze! The cookie also uses two different kinds of sugar, brown and turbinado or raw sugar. The difference is that the “raw” sugar comes in large, golden crystals that the dough is rolled in at the end to create a distinctive “sparkle” on the outside. Rolling them in the “raw” sugar is an easy way to give them a little pizzaz. This “raw” sugar is available in most grocery stores in the baking aisle, you just may have to hunt for it a little bit. I also filled these cookies with two different fillings. If you look closely at the pictures, there’s a slight color difference that gives it away. For about half, I used leftover chocolate ganache from my Chocolate Cake recipe from a couple weeks back. For the other half, I used the filling from the recipe. Below, I’ve doubled this amount because the original recipe amount only filled half of my cookies… They’re easy to overfill so go easy on the filling at first, you can always go back in and refill if needed. I hope that you find this recipe as delectable as I did and happy baking!
Spiced Molasses Chocolate Buttons Recipe
For the Dough
195 grams (1 1/2 cup +2 tablespoons) All Purpose flour
35 grams (6 tablespoons) unsweetened cocoa
3/4 teaspoon ground cinnamon
3/4 teaspoon baking soda
1/2 teaspoon kosher salt
1/2 teaspoon ground ginger
1/8 teaspoon ground allspice
142 grams (10 tablespoons) unsalted butter, at room temperature
106 grams (1/2 cup packed) dark brown sugar
1 teaspoon vanilla extract
1 large egg
85 grams (1/4 cup) molasses
100 grams turbinado sugar to coat
For the filling
57 grams (1/3 cup) bittersweet chocolate (I used semisweet chocolate chips and it seemed to not be too sweet)
28 grams (2 tablespoons) unsalted butter, chopped into smaller pieces
1/2 teaspoon molasses
Sift together the flour, cocoa, cinnamon, baking soda, salt, ginger, and all spice in a medium bowl.
Beat together butter, sugar, and vanilla until light and fluffy in a separate, large bowl. Beat in the egg until well mixed then add and mix in the molasses.
In two additions, mix together the dry and wet ingredients in the larger bowl until well-blended. Scrape the bowl then refrigerate the dough in the bowl for two hours. To retain the moisture, cover with cling wrap.
When ready to bake, line two baking sheets with parchment paper and preheat the oven to 350F.
Pour turbinado sugar onto a plate or bowl. Using a tablespoon scoop, scoop and portion the dough into balls. Roll in the sugar until covered completely. Place on the baking sheet about 1 1/2 inch apart. (They spread while baking but not by much)
Bake until set around the edges but still soft in the middle, 10 or 11 minutes depending on the strength of your over. Remove from oven and using a spoon, create a deep indent in the middle of each cookie. Return the cookies to the oven and bake 5-6 minutes more. Remove from the oven and let the cookies cool on the pans on a wire rack.
To make the filling, place the chocolate and butter together in a small microwave safe bowl and microwave in thirty second intervals until melted. Mix well between intervals (I have a terrible microwave and it only took me a minute to melt it) Once melted and mixed together, stir in the molasses.
Transfer the filling to a ziplock bag or a pastry bag. Snip a corner off the ziplock bag and fill each cookie. Let sit at room temperature until the filling is firm. Enjoy!
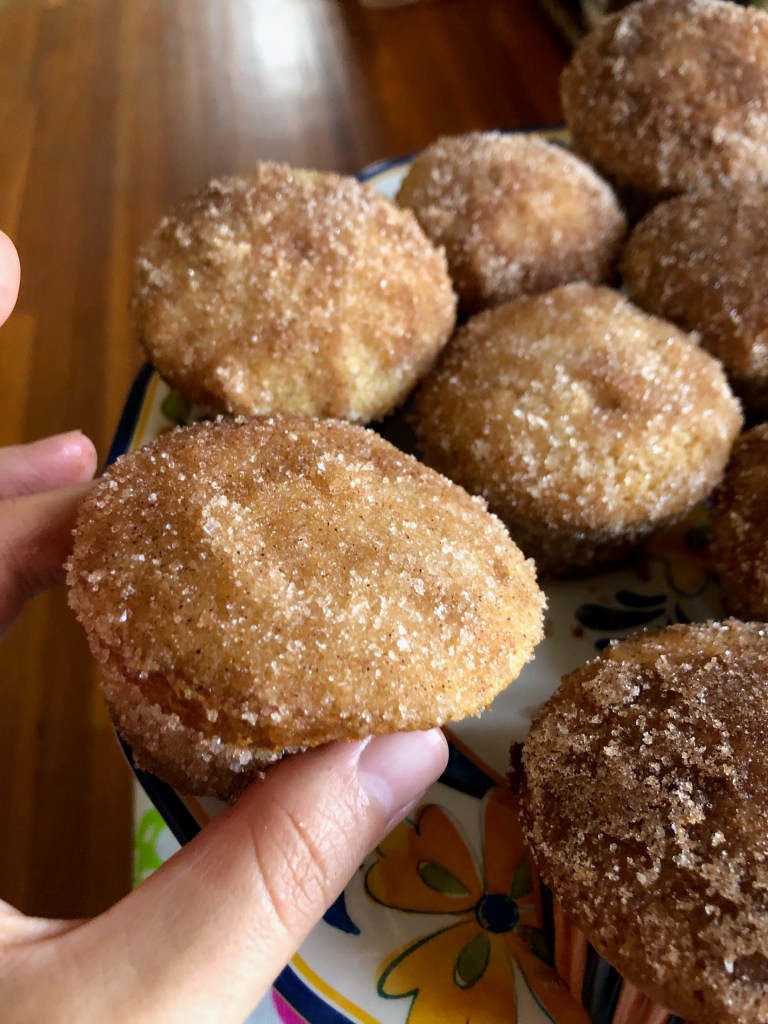
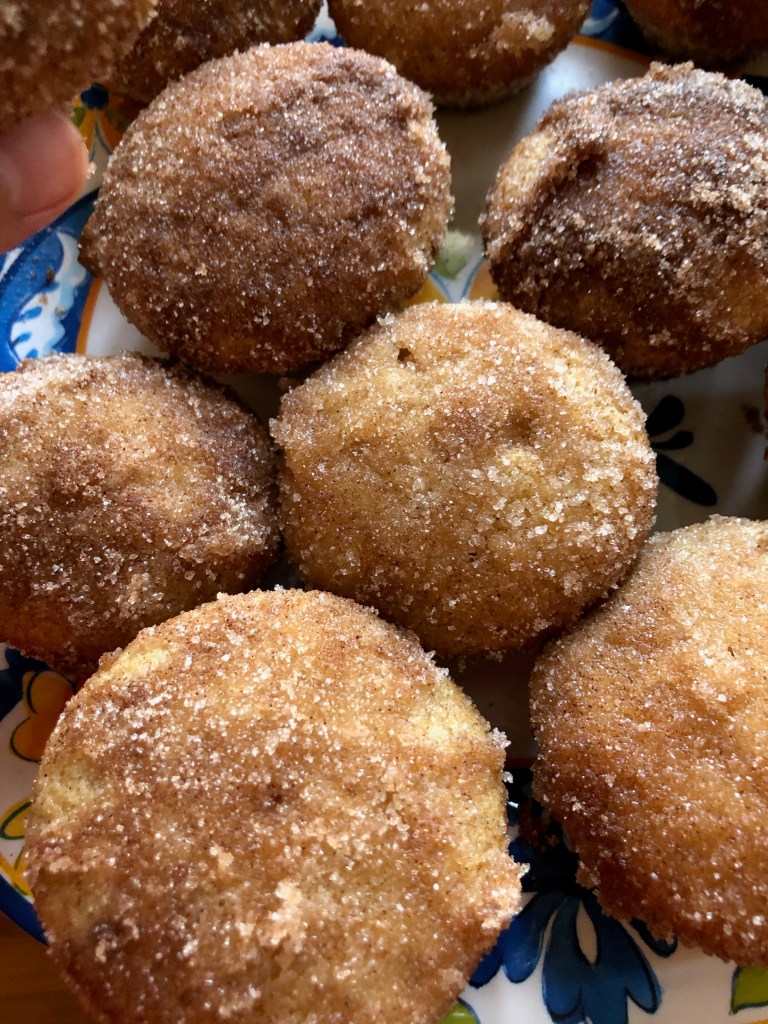
Wow these were amazing! I got this recipe from the New York Times Cooking app and had been wanting to make it for a while! I had some leftover apple cider from a trip to the orchard a few weeks ago and decided to give it a try! These were delicious! They are the same as the apple cider donuts traditionally sold by apple orchards but even better! I liked them more because I felt that they didn’t get soggy after a day or two of sitting around and they were a joy to eat! They had the same texture as a donut but without all the fat and grease from being deep-fried! The original recipe is for baked donuts but the only thing that makes them donuts is being baked in a donut pan. Because I am a college student and not a professional baker, I do not have a donut pan. However, I have multiple muffin pans that I put to great use as part of this recipe! It has been tasted and approved by my boyfriend so I feel very good about putting this recipe out for the world to see!
There isn’t a lot of technique involved with the recipe but there are a few tricks to know about the butter and eggs used in this recipe. For butter, most recipes call for softened or room temperature butter. It is ALWAYS better to leave butter out overnight to soften but I have found that the microwave works out just fine in a pinch. I microwave butter for thirty second intervals and keep a close eye on the butter. Once it is easy to leave an indent in the butter, it doesn’t need to be microwaved anymore and has reached the softened or room temperature stage. Another trick with temperature is with eggs. I leave my eggs in the fridge most of the time because I’m never sure when I’ll use them next. This recipe calls specifically for room temperature eggs as do many recipes with an end product that is moist but strong. An easy trick for getting eggs closer to room temperature is to boil some water. Let it cool and then pour it over the eggs. The temperature of the water will gently heat the eggs without cooking them completely. This is an easy trick that can help you stick to your recipe and get great end results. I used both of these tricks while making these muffins because they were a spur of the moment decision! I hope that you are able to be equally spontaneous in your creation of baked goods and I wish you luck with these! Happy baking!
Baked Apple Cider Muffins
For the Muffins
225 grams (1 3/4 cup) All Purpose flour
1 1/4 teaspoon baking powder
3/4 teaspoon kosher salt
1 teaspoon ground cinnamon
1 teaspoon ground nutmeg
140 grams (10 tablespoons) unsalted butter at room temperature
165 grams (3/4 cup) light brown sugar
50 grams (1/4 cup) granulated sugar
2 large eggs, at room temperature
1 teaspoon vanilla extract
120milliliters (1/2 cup) apple cider
For the Topping
100 grams (1/2 cup) granulated sugar
1 teaspoon ground cinnamon
To coat: 6 tablespoons butter, melted
Preheat the oven to 350F and line a muffin sheet and a half. This recipe made me about 15 muffins so be prepared to move to the second pan.
In a small bowl, whisk together flour, cinnamon, nutmeg, salt, and baking powder.
In a separate and larger bowl, cream together the butter and two sugars. Beat until light and fluffy
Once fluffy, beat in the eggs one at a time, ensuring they are fully mixed in. Then add the vanilla extract and mix until smooth.
In two additions, add the flour mixture, stirring in between additions. Gently pour in apple cider and stir until the batter becomes smooth and consistent.
Divide the batter evenly amongst the prepared cups and bake 23-27 minutes. Time will vary based on the heat and strength of your oven. Check for done-ness by inserting a toothpick into the center of a muffin and if it comes out clean, then it’s done!
While muffins are baking, whisk together the sugar and cinnamon and melt the butter. Keep the cinnamon-sugar and butter separate.
Once the muffins are done, let sit in the pan for five minutes. Once cool enough to touch, dip in butter then roll in cinnamon sugar. If you’re an enthusiast with the sugar, you may need to make more. If so, use the same amounts as before and store whatever you don’t use as long as it hasn’t touched butter.
Enjoy your muffins right away or at room temperature. Store in an airtight container and enjoy!
So in the past few days, I finished this book and it was really a delightful escape to the Paris of many years past. A Moveable Feast was published posthumously and is a chronicle of Hemingway’s time in Paris after the First World War with his wife Hadley and the people they encountered during their adventures. The last section is devoted to F. Scott Fitzgerald and their friendship. Despite the title, there is not much feasting going on but the book contains beautiful and melancholic descriptions of Paris. I choose this book because it came highly recommended from several expatriate sites when I was looking for books about France. As it was written about life in the twenties, I’m not sure how relevant it will be for my journey to France but I really did enjoy the book. This is yet another one of my secondhand reads which I love but please, please, please go buy something full price from your local bookstore! I love saving money on books but if you can spend it, your local bookstore could really use the support with the lack of walk-in traffic these days. I know that my favorite southern California bookstore was really struggling and they ended up asking people for business which really helped! But don’t let your local bookstore get to that point please! Bookstores are a super important part of the community so please support them! Now back to Hemingway!
I have never read any of Hemingway’s work but I was aware of his very “macho” reputation and propensity for being called Big Papa. Coming into this book with those assumptions, I was absolutely floored by the tenderness and melancholy that I found in this book. Not only was Hemingway emotive in the extreme, he also recognized his own foibles and didn’t shield them from the view of the reader. I really enjoyed just reading the little vignettes about his various experiences in Paris. In other parts of the novel, he was coarse and rude and terrible but overall, he wasn’t what I expected. Perhaps because he was in Paris during a period of relative peace and was yet building up his reputation as an author, he was more free to write about his entire experience and emotions. Hemingway’s last view chapters are dedicated to his relationship with F. Scott Fitzgerald and it’s clear that Hemingway cared both a great deal for F. Scott while vehemently hating Zelda Fitzgerald. Overall, I enjoyed the book because it was very refreshing and I felt that I got to experience Paris as Hemingway did. However, as any author, Hemingway takes liberties with the personalities involved, twisting them to suit the story. I would just caution the reader to not judge all the persons presented based on Hemingway’s account of them. I would recommend this book, especially to people who read a little before bed. The chapters are more like self-contained stories and are read quickly. If you’re looking for a little literature at night, this is an excellent place to start!
Good Morning everyone! I wanted to blog about something that is really important to me but something I didn’t realize wasn’t quite understood by everyone. I want to talk about Dia de Los Muertos. Some of this knowledge is personal but fact-checked with the help of the internet to make sure that I’m not leading anyone astray. I’ve celebrated Dia de Los Muertos with my mother for the past few years and it’s really important to us to take the time to remember our ancestors and honor them during this period. Dia de Los Muertos looks different for each family that celebrates and my mom and I celebrate in our own ways.
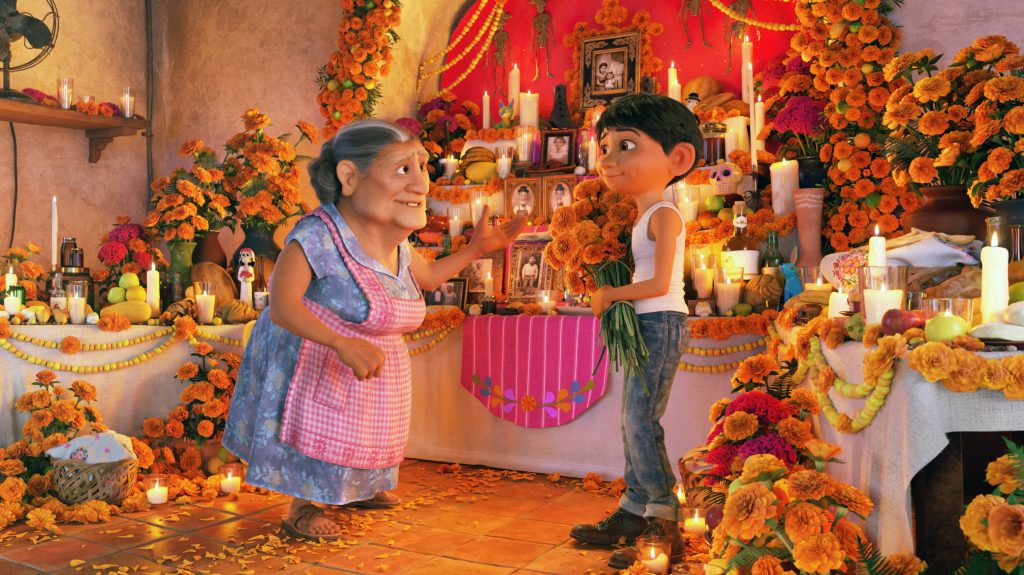
Coco-Disney Film
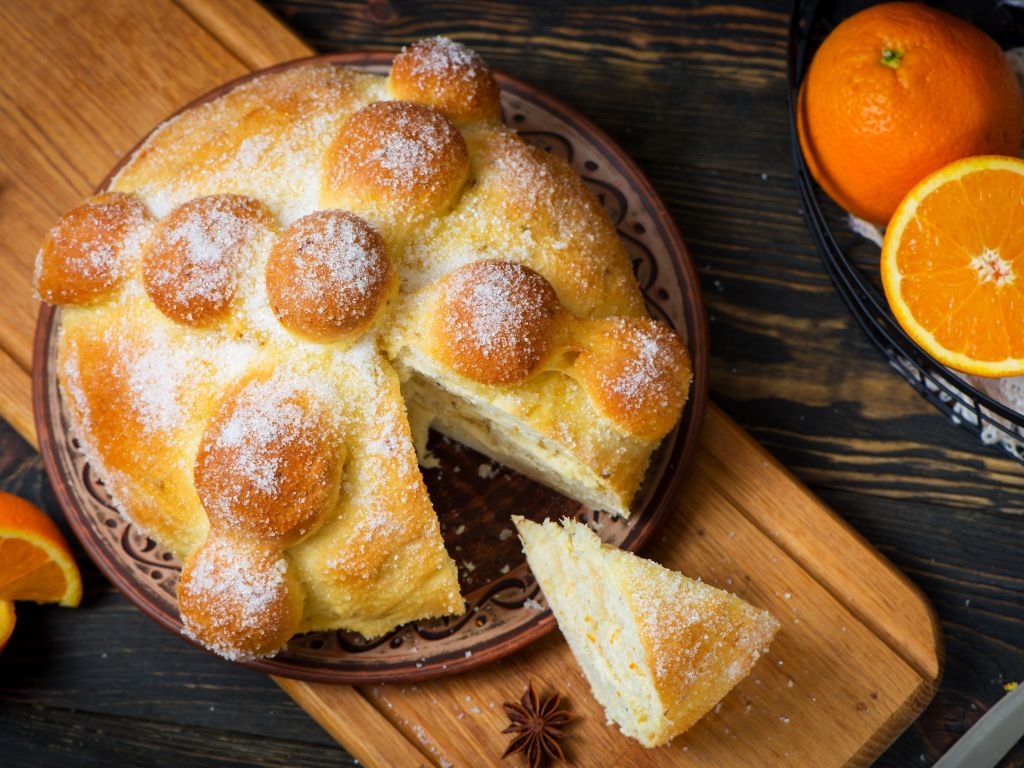
So what is the Day of the Dead? At first glance, it seems a little gruesome, like people just run around in skeleton makeup. It’s definitely not that but it’s also not “Mexican Halloween”. Many also now know about Day of the Dead through the Disney movie, Coco. Day of the Dead is a holiday that is celebrated primarily in Mexico but is also celebrated in other places especially where there has been a large Mexican immigrant diaspora. Day of the Dead is a way to celebrate and honor the lives of those who have passed before us and is both solemn and joyous. Dia de Los Muertos typically lasts two days and takes place on the first and second of November. The first day is called Dia de Los Innocentes and is a day for the celebration of children who passed before their time. The second day is for all and can include a grave beautification, creation of an ofrenda with marigolds, food, and photographs, and family celebrations in honor of those who already passed. Dia de Los Muertos also involves specific foods such as pan de muerto which is a large sweet bread flavored with oranges that is meant to resemble bones. Other foods commonly consumed include conchas or pan dulce and any food that was particularly special to any of the dead. So my uncle ron who I honor on my ofrenda loved cookies so I always bake chocolate cookies and put them on the ofrenda.
Pan de Muerto from Google Images
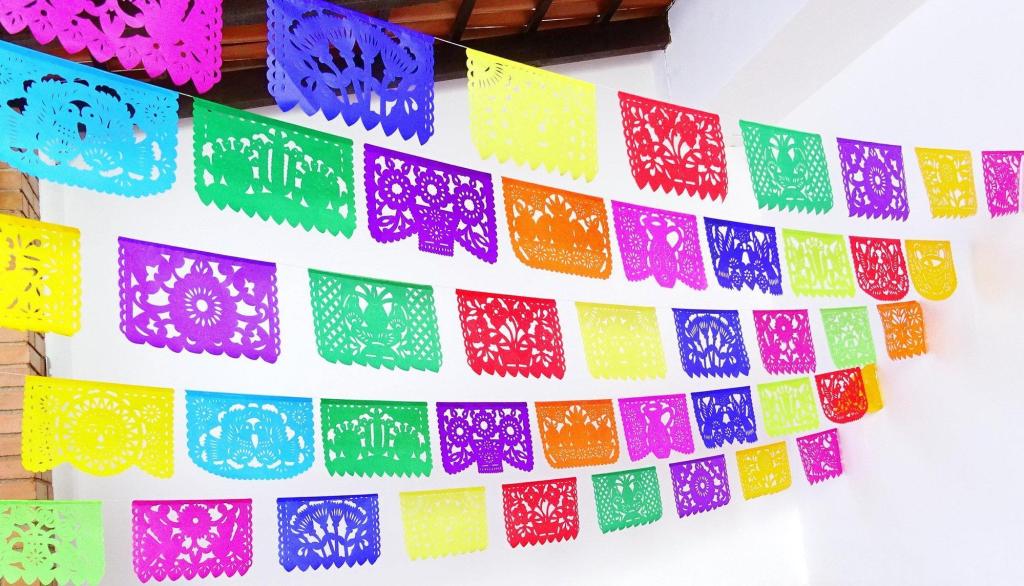
For me, Dia de Los Muertos looks a little different now that I’m in college. I’m several thousand miles from the graves of any of my relatives but that hasn’t really affected my celebrations. Since I’ve been at university, I’ve put up papel picador which is brightly colored and stenciled flags that I love to look at. I also create an ofrenda with paper marigolds and lots of sweets. On Dia de Los Muertos I try to take extra time in my day to remember and cherish those who have passed away. I also like to make extra time for my existing family and send them a little extra love. The dead that I remember come from those who surrounded me with love as a child or from afar. This year, I remember and honor Ronald, Annabelle, John, Lois, and Lorin.
Papel Picado
So what does Dia de Los Muertos look during the age of Covid? Well, quite a bit different. Many people are unable to access the grave sites of their loved ones in Mexico. Obviously, the parties and parades that have marked the days in past years have been forbidden for the good of public health. Even sculptures put out in Mexico City have been removed due to fears of crowding. The Mexican community is unable to celebrate one of the most important holidays and has also been hit extraordinarily hard by Covid-19. Many of the front line workers from hospitals to slaughterhouses to our fields to your grocery store are Latino and have been disproportionately affected by Covid. The year that the Mexican community needs Dia de Los Muertos the most, it is deprived of the collective mourning and community provided by this holiday. I’m lucky that I am able to spend Dia de Los Muertos with one of my loved ones but many aren’t as lucky. If you don’t celebrate Dia de Los Muertos, on November second, please take the time to recognize and thank the front-line workers. I’ll be keeping my ancestors in my prayers and I hope that you are also able to take the time to reflect on the dead who have impacted your life.
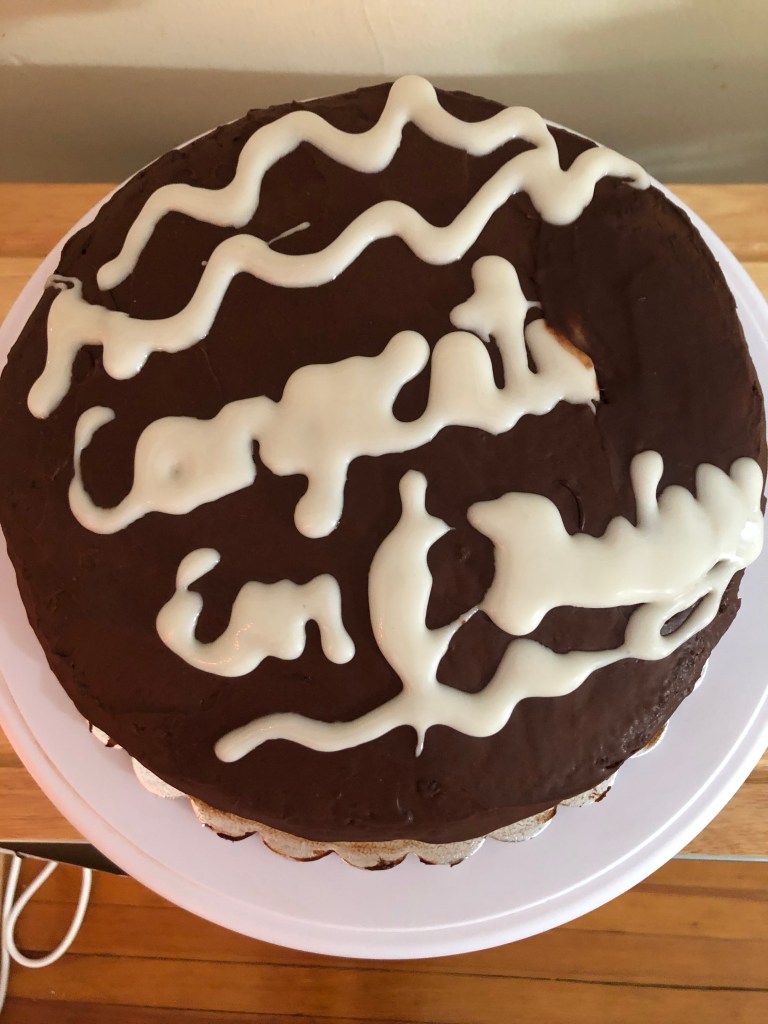
So I have to admit that the cover photo for today’s blog post was graciously taken by the recipients of this cake. Two of my friends recently celebrated their marriage and being a big baker, I asked if I could bake them a yummy if slightly messy cake. I had originally planned to do a butter cake with ganache frosting, a classic bumblebee cake. Looking around my pantry, I noticed I had a boxed mix of devil’s food cake that I had been dying to use and this seemed like a a perfect opportunity! Using a boxed cake mix meant that I was able to take my time with the other parts of the cake that added a lovely touch and taste. I should have taken a little extra time with the royal icing lettering but hindsight is 20/20! The royal icing was a little on the runnier side and smooshed together a little but I see that as protecting the privacy of the intended recipients!
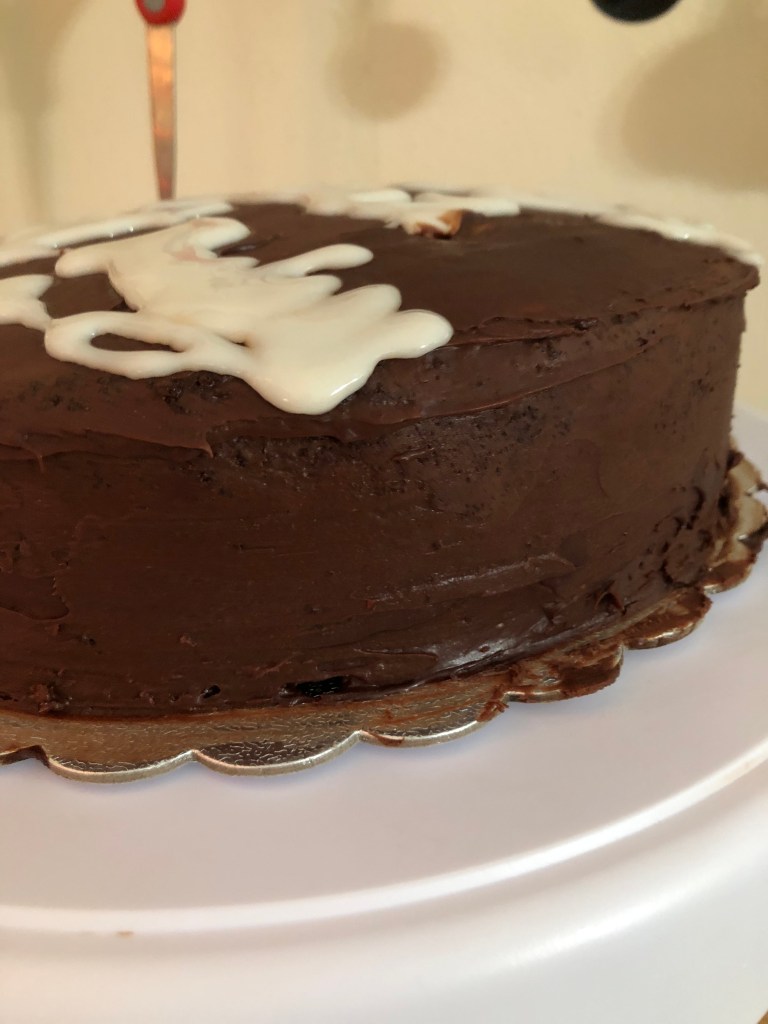
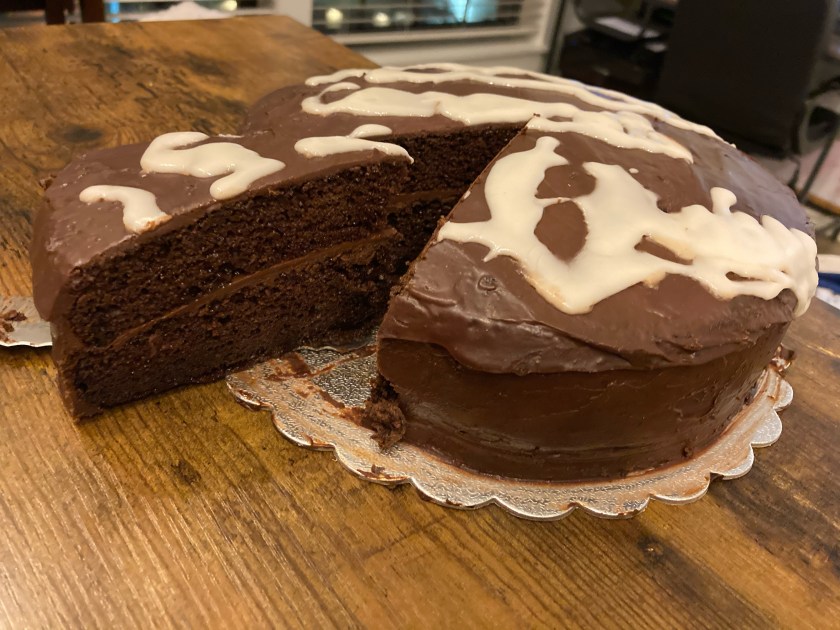
This cake has everything! Two layers of delicious cake with a simple syrup for additional moisture with a ganache frosting and royal icing lettering! This cake was actually a two-day process which sounds daunting but I actually think it makes the whole thing much less stressful. Taking the time to properly chill the cake and the frosting allows for the icing process to be much more stress-free! I really enjoyed icing the cake, something I’m not sure that I’ve ever said before. I used to HATE icing cakes; it was always way more trouble than it was worth. I would get crumbs everywhere and could never get a smooth coating of frosting! Let me tell you that has all changed! Equipped with the right tools and knowledge, I’ve become much more at ease in the icing department. The decorations still need a little bit of work but we can’t all be perfect! To properly ice a cake, you really should use a rotating cake stand. I used to hear this all the time and thought it was a bunch of hooey but it really has some merit. It makes it so much easier to get the sides of the cake without taking off too much frosting. Using offset spatulas also helps a LOT. The funky shape to these spatulas helps to evenly distribute the frosting in an intuitive way. One word of wisdom is that the offset spatula should never actually touch the cake. The spatula is used to move around the frosting which ends up covering the cake for you.
This ganache recipe is also one that I have used for a few years but have never taken the time to use all the different bowls and pans that it calls for. Even though it makes way more dishes (which my father never appreciates), this recipe is an easy way to get lovely tempered chocolate frosting for a whole cake. The key to this ganache is the right combination of hot and cold. It’s not as finicky most tempered chocolate recipes but it does need to be warm while being made. The cacao percentage of the chocolate is also very important. The original recipe calls for 62% cacao but I’ve never been able to find that and I use 66% cacao. This is a pretty dark chocolate but doesn’t need much sugar to sweeten it. This recipe won’t really work with a smaller percentage of cacao because the ganache will be too sweet and a little oily. It’s worth the extra couple bucks to get a higher cacao percentage for this recipe. I made this ganache on the morning of the assembly of the cake and put it in the fridge to chill before applying to the cake. One super easy way to soften the ganache if it has chilled is to put in a tablespoon or two of hot water and mix it into the ganache. It helps to soften it without exposing it to the harsh temperature induced by the microwave. Not that I don’t love a good microwave but it doesn’t quite do it for this recipe. I hope that you try this recipe and let me know about your successes or failures in the comments below! Happy baking!
Thanks E for the photos!
Chocolate Cake Recipe
For the Cake
1 box mix of chocolate cake or your favorite chocolate cake recipe
For the Simple Syrup
1/2 cup water
1/2 cup granulated sugar
For the Ganache
10 ounces of 66% Cacao chocolate
75 grams (2/3 cup) powdered sugar, sifted
170 grams (3/4 cup plus 1 tablespoon) heavy cream
2 large egg yolks
42 grams (3 tablespoons) unsalted butter, room temperature
For the Royal Icing
113 grams (1 cup) powdered sugar
1 tablespoon water
1 teaspoon egg white
Make the cake the day before assembly. Cut the pieces and wrap in cling wrap. Let chill in the fridge overnight.
To make the ganache, combine chocolate and powdered sugar in a heatproof bowl.
Put a medium pan of water on to simmer. This will act as part of a bain marie to melt the chocolate so make sure the heatproof bowl fits neatly into the top of the pot before you start the boil
In a small saucepan on medium heat, warm the heavy cream to a simmer. Once simmering, pour over the chocolate mixture and stir until the sugar is melted.
Nest the chocolate bowl over the pan of simmering water. Heat the bowl and stir until the chocolate has melted and the mixture is smooth. Remove from heat.
In a small heatproof bowl, whisk the egg yolks together. Add about a half cup of the chocolate mixture to the eggs and whisk vigorously with a fork to temper. Once shiny, pour back into the chocolate mixture and whisk to combine.
Add butter to chocolate and stir until smooth. Pour hot ganache through a sieve into a heatproof container and chill for at least 1 hour.
While the ganache is chilling, make the simple syrup. Combine sugar and water in a small saucepan and heat until sugar has dissolved into the water. Remove to a heatproof container and let cool. (This simple syrup works for cocktails as well so try to make some if you have leftovers)
Once the simple syrup and ganache have cooled, remove the cake from the fridge.
Unwrap and gently brush a conservative amount of syrup over each half of the cake. Make sure the cake is moistened but not soaked by the syrup.
Take the half of the cake that was the top and place on the cake stand. Take a generous dollop of ganache and spread it over this half.
Once thoroughly frosted, put the bottom half on top, with the side that was in the bottom of the pan on top. This ensures a flat cake.
Add dollops of ganache around the side of the cake. Using offset spatula, spread a thin layer of ganache over the sides.
Once a thin layer is created, chill the cake for at least an hour. While it is chilling, make the royal icing.
For the royal icing, mix all the ingredients together in a bowl. If too thick, add a teaspoon of water until desired consistency. If too runny, add additional powdered sugar until it stiffens.
Once the cake has chilled, remove from the fridge. Place a generous dollop of frosting on top and cover. Once the top is covered, add ganache to the sides to fully coat the cake.
To smooth the sides, hold the offset spatula tight to the side of the cake and spin the rotating stand while holding the spatula steady. Push the excess frosting from the sides to the top of the cake. Once there, smooth off into the top layer with the spatula.
Chill cake for at least 30 minutes before adding words or serve immediately. It will stay well wrapped in the fridge for five days.
If adding words, put the royal icing into an icing bag with a small writing tip and write out desired message. Make sure the icing isn’t too runny or your cake may look like mine!